Waygate Krautkramer USM 36 Flaw Detector
September 11, 2019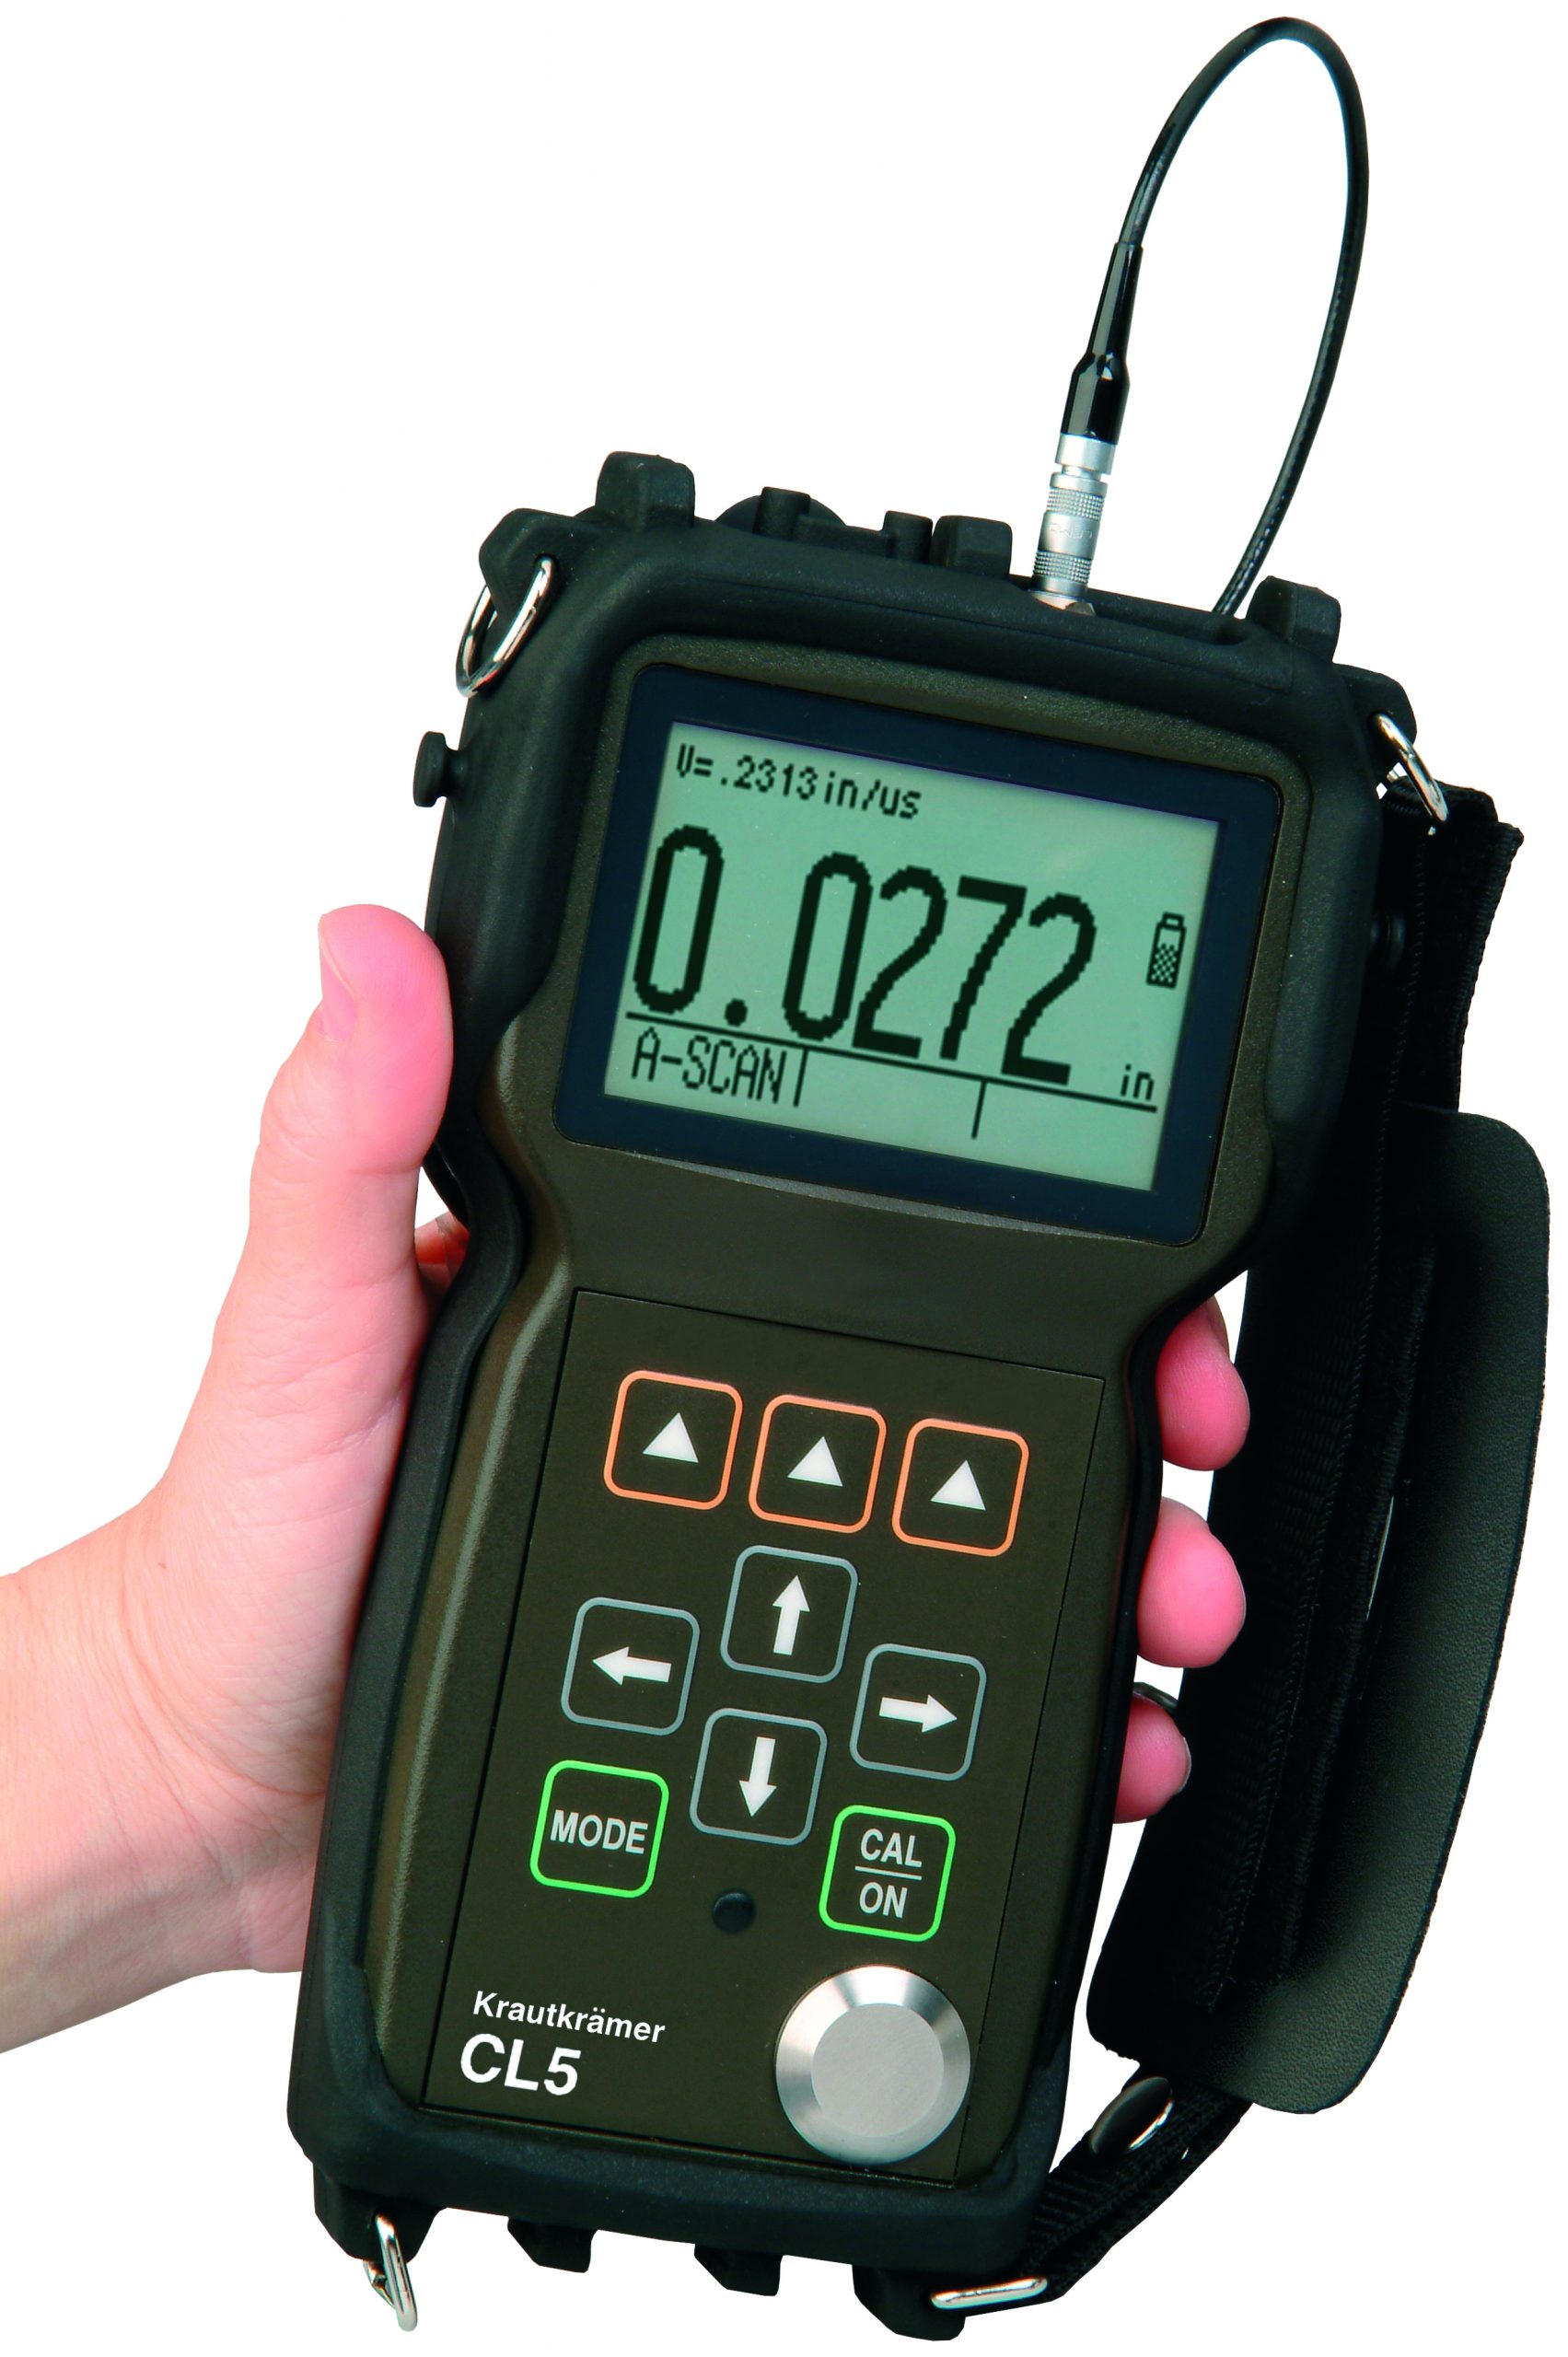
Waygate Krautkramer CL5 Precision Thickness Gauge (Discontinued)
September 11, 2019Waygate USM-GO+ / DMS-Go+ Flaw Detector and Corrosion Thickness Gauge
The new ultrasonic Go platform from GE’s Inspection Technologies business combines a thickness gauge and a flaw detector in one single lightweight instrument. With fast field software upgradeability, start with a DMS Go or USM-Go and add the other as your inspections demand, or buy both initially.

The new ultrasonic Go platform from GE’s Inspection Technologies business combines a thickness gauge and a flaw detector in one single lightweight instrument. With fast field software upgradeability, start with a DMS Go or USM-Go and add the other as your inspections demand, or buy both initially.
Details
USM-Go+:
What a field NDT operator needs is:
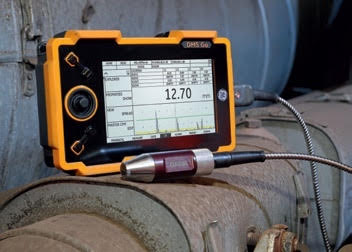
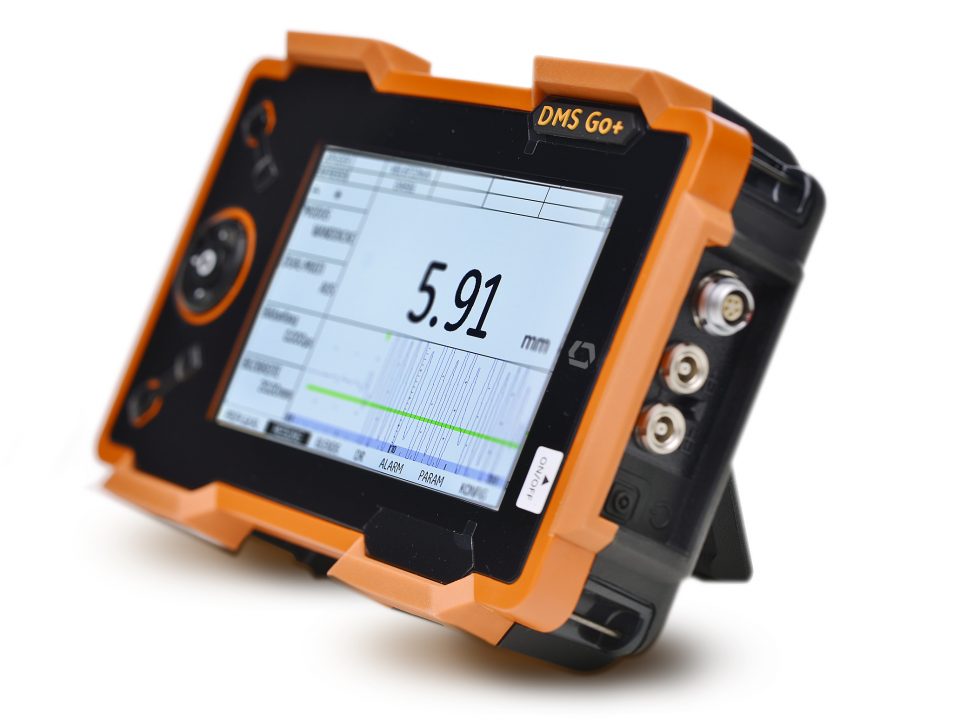
- An instrument you can use with one hand – The USM Go+ is the ideal device for portable ultrasonic testing. It comfortably fits in the palm of your hand or pocket of coveralls for ease of use and transport. It’s the perfect tool for operation in confined spaces, areas with difficult access or other difficult environments. Actually, you operate it with one hand, thanks to the arrow-keypad, which allows for intuitive navigation and fast and precise adjustments. That comes in handy, when you need your other hand to adjust the probe or just hold on to a ladder. Are you left-handed? No problem, use the ‘flip’ function to adapt the instrument to your hand
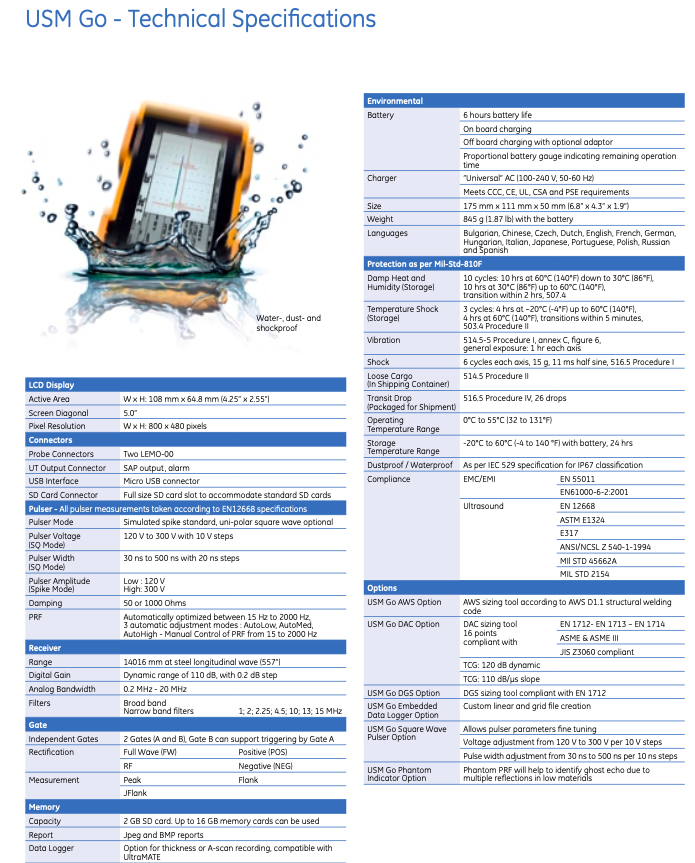
- A robust, heavy duty device – Its molded rubber casing makes the USM Go+ the sturdy instrument you need in the sometimes harsh conditions ‘in the field’. It is dust and waterproof to IP67 and has been tested according to military standards.
- The biggest and brightest screen in its class – The 108mm x 64,8 mm screen (zoomed mode) with best in class 800 x 480 pixel resolution offers optimum echo dynamics and separation. Moreover, it is exceptionally bright so you can easily read the image even in full sunlight. On the other hand, when working in the dark, you can reduce the brightness to reduce eye fatigue and conserve battery life. An integrated stand allows you to optimize the viewing angle, when the instrument is desk or bench mounted.
- Outstanding UT performance – Equipped with state-of-the art technology, the USM Go+ takes UT performance in handheld instruments a step further. The excellent near surface resolution enables you to detect flaws located just under the surface of the test piece with a high degree of reliability. A wide Pulse Repetition Frequency range allows you to use the USM Go+ at low PRF to inspect forged parts without any “ghost” echoes and to inspect welds at high PRF when fast scanning speed is required.
- A tool that boosts your productivity – Ultra-portable, easy-to-handle, intuitive operation, high performance – the USM Go+ is your plug & play tool that will give your productivity a boost the moment you start using it.
A wide range of applications:
The USM Go+ has been designed to provide flaw detection capability in inspection situations throughout the industrial and process spectrum, from aerospace to power generation and from the automotive sector to the oil and gas industry.
Weld Inspection:
- Trigonometric projections with curvature correction.
- AWS D1.1 sizing
- DAC/TCG
- DGS
- Color Leg
Inspection of Forgings and Castings:
- Manual PRF adjustmen
- Phantom echo indicator
- DGS
- Backwall Echo Attenuator (BEA)
Inspection of rails:
- High PRF (up to 2000 Hz)
- Lightweight: 850 g (1.87 lb.)
- Small size and ergonomics
Inspection of Composites:
- RF Display
- 2 gates with B-start triggered with echo in gate A
- TCG correction with high slope 120 dB/μs
- Reflector depth indicated in layer
For more demanding applications:
- Narrow band filters
- Low noise digital amplifier
- Square wave pulser
DMS-Go+:
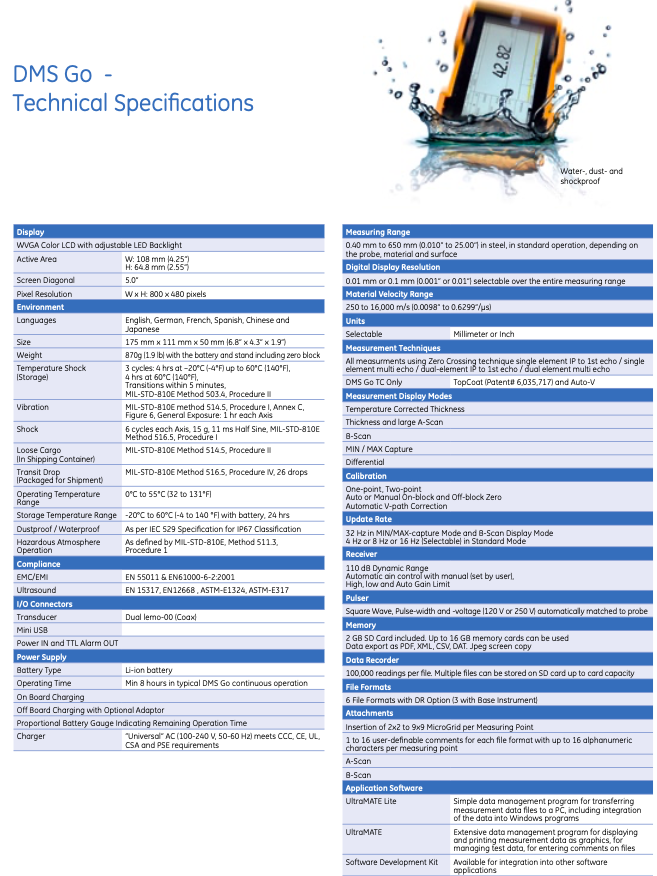
High performance thickness measurement
- Zero cross measurement technique for high measurement stability and reliability
- Automatic gain control for excellent repeatability and corrosion monitoring.
- Built-in temperature compensation for accurate measurement up to 540°C (1000°F)
- Multiple calibration and zeroing modes for repeatable accuracy.
- Multiple measurement modes, including thickness, A-scan, B-scan, Min/max and differential.
High capacity data recorder and compatibility with powerful data management systems
- On-board data recorder, with capacity of hundreds of thousands of thickness readings, with storage of A-scan, B-scan and MicroGrid attachments
- Data can be organized in pre-set, custom or advanced file structures.
- Data transfer is by SD card or via USB port to PC. Data can be transferred in various file formats to allow easy integration with user data management systems.
- Compatible with UltraMate and UltraMate Lite data management programs to allow for comprehensive data analysis and documentation.
Ease of use
- Intuitive arrow-keypad for positive digital control of parameters
- One hand operation and one-hand, menu-directed calibration process
- A “Flip” function allows use by both left-handed and right-handed operatives.
- A large, 800×480 pixel, display screen, ergonomically sized to reduce eye-strain, which can be adjusted to provide optimum visibility in various ambient light conditions.
- Small size, lightweight (870g, 1.9lb), robust construction to IP67 for operation in harsh environments.
- Battery allows up to 10 hours operation and can be re-charged on- or off-board.
Specifications
